Tampilkan postingan dengan label recipes. Tampilkan semua postingan

Senin, 17 Maret 2014

Mint Chip Super Food Ice Cream

In honor of St. Patrick's Day, I decided to churn up some creamy green goodness. I'm trying to avoid refined sugar so I used a combo of medjool dates and stevia to sweeten it. I added some avocado and spinach for the green as well as collagen, probiotics, and some green banana for the resistant starch. That's a lot of nutrition packed into a tasty frozen treat!


Mint Chip Super Food Ice Cream

2 Medjool dates (take out the pit first!)
1 very small avocado (half of a medium or large one)
1/4 cup frozen spinach*
1/2 frozen green banana*
1/2 contents of one probiotic capsule
1 Tbs collagen
1 tsp powdered stevia
1/2 tsp peppermint extract
1/4 tsp real salt
1/2 cup enjoy life chips

Blend all ingredients (except chocolate chips) -- I used my Vitamix. I blended it for quite some time because I wanted to make sure that everything was completely incorporated. Refrigerate for at least 30 minutes before churning it in an ice cream maker until it reaches the consistency of soft serve. Empty into a quart sized Tupperware container and mix in chocolate chips. Dish out a nice scoop into a chilled bowl and enjoy! Stick the rest in the freezer and get your super foods in each day for the rest of the week.

I prefer to make my ice cream really rich and creamy as opposed to lighter and less filling. I tend to only eat a tiny bowl of it at a time and really savor it. I find it's much more satisfying than something that I can eat and eat without getting full.

*You can use fresh/not frozen spinach and banana - just chill the mixture longer before churning.  


Jumat, 20 Desember 2013

Gluten Free Baking

Gingerbread Cookies
Maybe it’s just the time of the year (the Holidays!) but I’ve gotten into several discussions about baking lately. It’s no secret that I’m gluten free and people are often shocked that what I offer doesn’t wind up tasting like a door-stop. Part of what works for me is using good ingredients and making things fresh. I also do a crazy amount of research and am always trying out new things. In an effort to share what I’ve learned, particularly what works and what doesn’t as well as where to get specialty ingredients, I’m putting together this post for reference.

One of the biggest obstacles people face when going gluten-free is getting used to new ingredients and their often higher prices. They are also sometimes harder to find. However, once you get the hang of it, baking is just as easy (or difficult) as it always has been.

Mint Milanos
A note about the expense: going gluten free is like any other kind of dietary change. It’s very easy to get caught up in the one-to-one replacements and wind up with an even less nutrient dense (and more expensive) diet. It’s important to note that most wheat products like bread, pasta, etc. are all fortified with vitamins and minerals – this minimum dosage is just enough to keep us from severe diseases of deficiency, but are in no way the optimal way to get these nutrients. That being said, switching from wheat-based processed food to gluten free processed food, which is not usually fortified, can lead to disaster. If, instead, you choose to switch the base of your diet away from grains in general in favor of fruits, vegetables, and high quality proteins and fats, you’ll be significantly improving your overall nutrient intake. This way of eating is also much cheaper than buying all the gluten free packaged food available these days.

Snickerdoodles
All of this is to say that baking is not the answer to changing your diet and not noticing a difference. There should be a difference. However, that doesn’t mean that you have to say goodbye to age old traditions like baking cookies on Christmas. There is just something lovely about making and sharing yummy treats with friends and family.

Since this particular brand of oven-baked joy is my cup of tea, I’d like to share my go-to ingredients and favorite recipes (found for free online!) I buy quite a bit online, mostly on Amazon, but some things can be bought in stores. I will include affiliate links where applicable, but also mention when you can probably get items locally.

Ingredients

Almond Flour
This is my preferred brand for a fine, light texture perfect for cookies and cakes.
Almond Meal
I buy this at my local Trader Joes and it includes the almond skins and is very course – cookies baked with this come out more like oatmeal cookies than regular chocolate chip. It’s also good for making buns or “bread” for a more whole grain texture.
Coconut Flour
This can also be found at my local Wegmans, Whole Foods, etc. I’m not as picky about brand with this stuff. I haven’t tried one that didn’t work as of yet. 
Grade B Maple Syrup
This has to be my secret weapon ingredient. Using this recreates the right flavor profile for chocolate chip cookies, which traditionally would use white and brown sugar. I buy it at Trader Joes and find the Grade B is way better than the thinner, less rich Grade A.
Coconut Oil
This can also be bought in most stores and is great for replacing butter, if you are very dairy intolerant. It works surprisingly well.
Palm Shortening aka Vegan Shortening
Somehow this isn’t a trans-fat nightmare and is considered a safe alternative. I don’t use it much, but have on occasion when you need a completely neutral flavor. You can also use this as a sub for things like butter or lard.
Swerve Confectioner’s
This is a low carb product that I use in icings and as the sweetener in homemade ice cream (it keeps it from getting rock hard). I use this powdered version in all applications, sometimes cutting the suggested amount (the granular version doesn’t taste as sweet to me and I get more bang for the buck with this).
Stevia
This brand is great in my coffee and I can sometimes get away with using a little bit in place of caloric sweeteners but doesn’t generally work that well in baked goods all by itself. You only need the tiniest bit of this – I use the undiluted version so it doesn’t measure like sugar at all. I prefer not to pay for the bulking agents.

Recipes


Choc Chip Macaroons
I am an avid collector of online recipes and you can follow me on Pinterest, if you want to keep up to date with stuff I’m trying. However, I think it’s important to start with the tried and true, especially when you are just starting to buy new ingredients. There is nothing worse than throwing out a whole batch of something that just didn’t work. It’s also important to follow the instructions carefully – the ingredients and method are what the recipe writer used and found to work. Changing it up is fun, but can result in flops. I recommend finding something that appeals to you, you have or can get ALL the required ingredients, and then follow it exactly the first time. Not every suggestion is going to meet that set of criteria, so I say skip the ones that aren’t a perfect match for your needs and abilities and just try something you can do as described. I cannot stress this enough – you cannot determine if a recipe works unless you actually follow it! That being said, I DO sometimes tweak things (I’ve been at this for some time) and I will note things that I’ve tried successfully along with the links, in case those alterations appeal to you, too. I mostly just want you to have a good experience out of the gate!

Chocolate Chip Cookies
I should also mention that gluten free baking IS different from its wheat-laden, more ubiquitous pastry-cousins. You cannot simply swap out the regular flour in a beloved recipe with a gluten free alternative and get the same result. When starting out, choose a recipe already developed and tested by someone else before trying to adapt old favorites. There is a learning curve and it takes a bit of experience to get a feel for how different flours behave.

All the recipes are Paleo-friendly, but not necessarily Low Carb (LC). I’ve noted the ones that use non-caloric sweeteners as LC, in case you want to especially use those to avoid as many carbs as possible or avoid them due to the questionable ingredients. For me, I’ve determined that Swerve and Stevia are within my comfort zone of safety, but I do not use or advocate the use of aspartame, Splenda, or other more widely available artificial sweeteners. I also avoid Truvia, which is neither True, nor Stevia. And, it tastes bad. BAD.

On to the links!!!!
The Wonder Bun

My version of the Wonder Bun
I don't eat a lot of bread-like things anymore. They simply aren't worth the time or energy, most of the time. But when I just need something, this does the trick! I use these mostly for open faced melted cheese to go with Tomato Soup and as croutons in French Onion Soup. I don't usually bother for burgers anymore, but it works well for those, too.
The Food Lovers
Chocolate Chip Cookies
I often use melted butter in place of the coconut oil (both work well!) and sometimes swap white chocolate chips and macadamia nuts for the chocolate chips. If you use chocolate chips, any brand will work. They just list the allergy-friendly type for sensitive folks. The Enjoy Life ones are awesome, just a bit pricier, if that’s not a concern for you.
Pumpkin Cookies
These are a huge hit every fall and have the added benefit of being vegan - everybody can enjoy them!
Gingerbread Men or their Updated Version
I’ve made the original version as instructed with cookie cutters, but also made them without rolling them out, using my cookie-disher, and smooshing them down before baking. I make royal icing either with organic powdered sugar or powdered Swerve. I either pipe it on all fancy-like when using the cookie cutters or just slather it on when doing the regular cookies. Both ways taste incredible. I haven't tried their updated version, but I'm sure that's wonderful, too. Maybe better since they revised it? Hard to imagine since I LOVE the original.
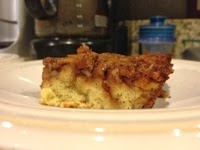
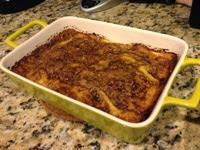
Sticky Bun Cake
Comfy Belly
Cinnamon Bun Muffins (almond flour)
Cinnamon Bun Muffins (coconut flour)
Sticky Bun Cake (my adapted version of the above) (LC)
I make some version of the above three recipes quite often. So easy and delicious!
The Paleo Parents
Chocolate Chip Macaroons
The salty-sweet combo of these is off the charts good. If you use dairy free chocolate chips, these are completely vegan (and autoimmune Paleo compatible without the chips).
The Urban Poser
Snickerdoodles
These are incredible. That is all.
All Day I Dream About Food
Cinnamon Rolls
Nutella Loaf (LC)
This has to be hands-down the best completely low carb cake I've ever made. It tastes a lot how I remember those marble poundcakes at Starbucks.
Pumpkin Cheesecake Muffins (LC)
Also Starbucks-inspired. Hmm...
Maria Emmerich
Cinnamon Rolls (LC)
This recipe uses a somewhat controversial ingredient called Psyllium Husk Powder. Please read this post about its safety – this is why I use it. It makes gluten free baked goods have the right doughy texture for things like this recipe. Just don’t buy a huge thing of it, like I did! You need very little per recipe. I also generally just use royal icing made with Swerve on these, too (like the gingerbread cookies). This Brown Butter Icing recipe is also amazing, though.
My Mint Milano Creations
This recreation went amazingly well and hit on some deep childhood memories. The originals were always my favorite cookies and I could easily eat a whole box of them all at once. Making them from scratch with better ingredients staves off the urge to binge on them.

There are so many great recipes out there but these are my favorites that I go back to over and over. I hope this helps you get started and have some success right away. I would also recommend browsing the websites I linked to above for more recipes – they are generally trusted sites with great content. For more recipe ideas, follow me on Pinterest!


Kamis, 12 Desember 2013

Sticky Bun Cake


I have been in love with these Cinnamon Bun Muffins since the day I discovered them a couple years ago. I have made them countless times to rave reviews. Over time, I've tweaked the recipe several different ways but often following mostly as-is, using maple syrup and no nuts to make a straight-up cinnamon bun taste sensation. Lately, since I'm doing my Keto experiment, I have been playing around with using only just enough caloric sweetener to get the flavor profile, while filling out the sweetness with either Swerve or Stevia. Cute man hates this but tolerates it in some recipes but not others. When making this one, he did not notice so score one for the home team! All in all, the fewer baked things I eat, the better for my fat loss goals, but I enjoy being able to live a little without completely blowing it.

As for the caloric sweeteners, after reading about the GAPS Diet, I'm doing my best to avoid maple syrup in favor of honey. It has to do with the former being a disaccharide made out of two bonded sugar molecules, which are harder to digest, thus making it further down the digestive process to then be food for the "bad" bacteria in our guts (aka nasty beasties). Honey is considered a monosaccharide, which digests more quickly and is bio-available to us as opposed to the nasty beasties. This doesn't make 100% sense to me, because doesn't honey have both fructose and glucose aka two different sugars? Maybe they're not bonded or something; I don't really know and can't seem to find a satisfactory explanation anywhere. So, if you understand, please explain it to me. I am missing my maple syrup like crazy!

Moving on... I knew honey tasted differently, but I'm finding that it's usually not the flavor profile I'm looking for. As a result,I started looking for things in which I would purposely use honey... When I looked at this recipe again, I realized I could use the honey option and add pecans for more of a sticky bun as opposed to cinnamon bun flavor. I also adjusted it to be a cake, not muffins and changed the liquid measurements to compensate for not using the full amount of honey. I normally don't reprint others' recipes unless there is a significant change. I think I've met that threshold here, but please visit the original recipe for more inspiration and to support the author's work. I've also reviewed her cookbook on the Paleo Parents' site.  

Here is how it shaped up for me:

Sticky Bun Cake
Makes 8 servings

For the Cake
1/2 cup of coconut flour
1/4 teaspoon of baking soda
1/4 teaspoon of sea salt
1/4 cup of Swerve (can use 1 teaspoon of Stevia)
4 eggs


For the Sticky Topping
2 tablespoons of melted unsalted butter (can use ghee or coconut oil)
4 tablespoons of honey
1 tablespoon of ground cinnamon
1/4 cup of chopped pecans


  • Pre-heat oven to 350 degrees.
  • Mix all the cake's dry ingredients together.
  • Add the egg and coconut milk, mixing to combine.
  • Pour into a greased baking pan (like from this set or an 8 inch round)
  • For the topping, melt butter in a 2 cup glass measuring cup in the microwave or on the stove.
  • Add remaining ingredients and stir.
  • Pour over the cake batter and swirl the surface with a knife.
  • Pop the cake into the oven and bake for 25 minutes or until a knife comes out cleanly when you poke it.
  • Let cool a bit (if you can) and enjoy :)
  • To store, you can leave it out, covered, at room temperature for a few days or put it in the fridge to extend it to a week (I hear, but never experienced it lasting that long!


Healthy Amelia

Senin, 18 Maret 2013

Non-dairy Mint Chip Ice Cream

In honor of St. Patty's Day, I whipped up some bright green ice cream. I went with a non-caloric sweetener called Swerveto keep it lower carb and give it a soft texture but you can use any liquid or granulated sweetener you want.


Here's what I did:

1 can full fat coconut milk
1 cup fresh spinach
1/3 cup liquid or granulated sweetener
3 egg yolks
1 tsp peppermint extract
1/2 cup dark chocolate chips

Combine all ingredients (except chocolate chips) in a blender and mix extremely well until all the spinach liquefies and the mixture becomes a consistent green. Refrigerate at least a half hour to make sure the mixture is nice and cold. Add it to your ice cream maker and let it churn until it firms up (about 20 minutes). While the ice cream is churning, pulse the chips a few times in a dry blender jar so they become crumbly. When your ice cream firms up, add the chocolate crumbles and let it churn a few minutes more to incorporate. Enjoy!

Jumat, 31 Agustus 2012

Ketosis - an experiment (high protein breakfast recipe)

Since starting this ketosis experiment, I’ve been a bit unsure about the amount of protein to eat. On the one hand, I was inspired to try this out because of Jimmy Moore’s recent posts about nutritional ketosis. He’s going extremely low carb and keeping his protein pretty low, too. I think he’s doing something like 85% fat. I know I wasn’t going to emulate that, but to simply keep my carbs under 50 grams total per day. My original breakdown had me eating a pretty large whack of fat and not a whole lot of protein. I had some good advice from my friend Jen, who urged me to up that to make sure I’m sparing muscle as I lose fat. I was still holding on to the fear that maybe too much protein would convert to glucose and knock me out of ketosis. The jury is still out on that one and it doesn’t look like it is probably the big deal I thought it was. Also, I just wasn’t naturally gravitating to eating as much protein as I thought anyway.


Still kind of confused, I listened to a podcast about protein (great timing – thanks Jimmy!) The expert on there recommended eating a minimum of 30 g of protein per meal for everybody. He said it didn’t much matter how big you are or what gender because that amount is has more to do with blood volume than body mass, which doesn’t vary that much across people. So interesting and so not what I thought. He did not think that the calculations based on body size were necessary. That minimum was good for all, although people who work out a lot would need more for repair. Listening to him speak, it made a great deal of sense so I’m going to try this. It happens to work well within the macronutrient amounts/percentages I’ve been using as my goals – Carbs: 48g/10%; Fat: 114g/70%; Protein: 95g/20% (this is within the framework of a 1900 calorie max, which I rarely even approach, by the way – it’s been in the 1550-1750 range).

The goals are great, but I’m usually short of this on my protein – a bit at lunch and definitely at breakfast. Dinner usually comes close to or hits the mark of 30 grams at a meal. As a result, I’m going to change things up a bit more, focusing first on breakfast. The first step is to stop with the Bulletproof Coffee in the morning. I’ve been getting a bit of protein in with it, but nowhere near the 30 gram level. I’m going to switch to a protein centered breakfast and build the other components around getting 30 grams in during that meal. I have a feeling that this change alone will put me on the right path. I’m also looking forward to stopping the caffeine again. I’m just not feeling all that great lately and I think it’s the caffeine, as much as I hate to admit it. How many times I need to go down this road in order to learn this lesson I’ll never know. Progress not perfection, I guess! A long holiday weekend is the best time to let it naturally get out of my system when I can sleep in and rest as much as I want.

30 grams of protein during the first meal of the day will be a challenge for me. It is not natural for me to eat that much in the morning, period. But I think it’s worth a try, so I’m going for it. To make sure it happens during the first week, I’m going to make the following recipe that I will make in a casserole pan and cut into six pretty large portions. It’s going to be A LOT of food for me, but we’ll see how it goes. I’ll put the nutrient breakdown below as well so you can see how it fits into the context of my overall eating plan.

Sausage, Egg, and Spinach Bake
Serves 6
Each serving contains: 393 calories, 4g carbs, 29g fat, 30g protein

12oz loose breakfast sausage (US Wellness Meats)
1 onion, coarsely chopped (I used red)
2 cups frozen spinach
18 large eggs
Salt, pepper, seasonings to taste (I used a mixed seasoning from Trader Joe’s plus sea salt)
1 tablespoon butter or ghee


Preheat oven to 350 degrees. Brown up the sausage in a large oven-proof casserole pan on medium heat, breaking up the pieces as you sauté. When cooked through, empty the sausage into a large mixing bowl. Using the same pan, now greased from the sausage, add in the chopped onion. When the onions become translucent, add the frozen spinach and cook, stirring often, until thawed and most of the excess water has evaporated. Empty the contents of the pan once again into the mixing bowl. Let the contents of the bowl cool a bit for 5 minutes or so to prevent the eggs from starting to cook right there in the bowl. Use the cooling time to add the salt and spices of choice to the mixture as well as to add butter or ghee to the casserole pan you used to cook the sausage and veggies, using the residual heat to melt the fat and a pastry brush to coat the sides a bit (or grease a casserole dish, if your pan is too small).

Once cooled, push the contents of the bowl to one side and add the eggs on the other side (this just makes it easier to whisk the eggs). Whisk the eggs until fluffy and then incorporate the rest of the mixture before pouring the whole bowlful back into the casserole pan or into the greased casserole dish. Place the pan/dish in the oven and bake until solid, about 30 minutes. The eggs may puff up a bit, but will go back down when you take it out of the oven. Cut into 6 evenly sized pieces and enjoy your 30 grams of protein for breakfast!

Rabu, 29 Agustus 2012

Ketosis - an Experiment (treat edition)

You'd think that keeping total carbs below 50 grams would completely nix the idea of treats. But where there's a will, there's a way! For the most part, I do shy away from sugar based as well as artificial sweeteners. But I've come to realize that a little can go a long way and that having a bit of a treat to look forward to does have a positive psychological benefit. I mostly use Stevia to satisfy the sweet taste, but will also sometimes add a very small quantity of maple syrup, honey, or even regular sugar to things to give them a more authentic taste, without adding significant carbs (under 5g per serving does not bother me or spike cravings).

I should also mention that I've decided to stay mostly dairy free (except butter and ghee). As exciting as it was to think about eating cheese and heavy cream again, I realized that I'm better off without it and don't really miss it right now. I still deal with seasonal allergies which is a sign that my gut is still not completely healed. I suspect my inconsistency with dairy may be playing a part.

So far, I've come up with several treats that I've been enjoying all the while staying comfortably in ketosis. The first is this amazing recipe for Caramelized Coconut Chips from Melissa Joulwan. It is incredibly simple, fast, and more delicious than it has any right to be. Seriously, folks. I am addicted. It has the slightly crunchy appeal of popcorn with the additional saving grace of being super filling. I make it by the half cup and that is perfect for satisfying the snack monster without derailing my experiment. Win-win!

Second up is a crustless key lime pie recipe that I made in tiny 4oz jars subbing a dropperful of stevia for the honey. The dominant tart taste from the freshly squeezed key limes really made this turn out great even with only using the stevia.

My next attempt was chocolate mouse. I did use a tablespoon of maple syrup in edition to a few drops of stevia, to give it a more decadent taste. Keeping the portion small kept the amount of actual sugar eaten per sitting quite negligible. I made half the recipe linked above, and split it into 3 little jars. Using the top layer of cream from regular full fat coconut milk really makes this taste rich and the portion size turned out to be just right. I love how real, healthy fat like that in coconut, is so satisfying and self limiting. It's truly impossible for me to eat too much - a few bites and I've had enough. It's amazing! Another plus is that it really did take less than 5 minutes.

Another good one that hits the chocolate spot is the fat bomb. I'm still perfecting this one - I keep forgetting to add a bit of salt since I use unsalted ghee instead of the salted butter called for. I think that will round out the flavor. I am really looking forward to my new chocolate powder, cocoa butter, and vanilla I ordered. I am imagining all sorts of yumminess I can create with those! If I'm going to be this low carb, some quality ingredients DO make a big difference.

Last but not least, I made some homemade jello using Great Lakes Gelatin and brewed herbal tea, sweetened with a little stevia. Since the ingredients are all carb free and almost calorie free no less, I made these in larger jars. I made two each of orange and apple flavored teas. I'm always looking to get more gelatin in for joint health and gut healing, so this is a big win for me.

My first week of intentionally eating a ketogenic diet has been much easier and less stressful then I would have imagined. I think the transition was helped by the fact that I was really only going from a low carb (75-150 grams per day) diet to a very low carb diet (under 50 grams). Not being completely dependent on sugar to begin with made a big difference. However, as small a change as this may seem, I think it's a critical one for me. Keeping carbs at this level has completely evened out and stabilized my appetite as well as gotten rid of the intrusive cravings. Though by no means an "easy" lifestyle, it does feel sustainable for no other reason than it keeps food more in its rightful place instead of dominating my thoughts and life to a large extent as in the past. I am still the foodie I've always been, loving to cook, try new things, and share my creations with others. But I'm starting to feel more focused about it now that I feel like I'm running the show instead of my cravings.

Jumat, 16 Maret 2012

This Week's Internet Eats

I’ve come across a few new recipes that I’ll be trying this week as well as indulging in my current favorite Orange Chicken. It’s clear that I have a hankering for Thai food in general and chicken dishes; the crockpot will get some use as well. I’m saving the meat and Thai dishes for later in the week because I’m waiting on a delivery from US Wellness Meats as well as some Red Boat Fish Sauce that I ordered online. I guess in the meantime, I’ll chow down on the little egg pizzas – they look sooooo good! As usual it’s mostly the dinners I have noted here. I usually wing it for breakfast (often just a coconut oil laced hot cocoa) and take leftovers or lunch meat or hot dogs and veggies for lunch. The exceptions are the Paleo Breakfast Bread and Pumpkin Bacon Pancakes, which both looked way to easy and delicious NOT to try. They will be weekend whip-ups. So here’s a look at what’s on the menu this week.

Paleo Breakfast Bread

Pumpkin Bacon Pancakes

Mini Egg Pizzas

Paleo Orange Chicken
    (I add a tablespoon of honey to this recipe per Holly's advice)

Honey Garlic Chicken Slow Cooker Recipe
    with Parmesan Creamed Onions

Most Simple Thai Beef Crockpot Recipe

Paleo Thai Basil Meatballs


Selasa, 14 Februari 2012

Sweet Treats - Part Two

The homemade peppermint patty and peanut butter cup bites I mentioned yesterday turned out amazing! What a fun treat. I sort of took in the ideas from both recipes and smushed them together to make creating them at the same time more efficient.


You'll need:

Two loaf size pans
Parchment Paper
2 cups Enjoy Life semi sweet chocolate chips
1/2 cup cashew butter (can use peanut or almond butter)
1 Tbs Maple Syrup (can use honey)
1/2 cup coconut oil
3/4 tsp Organic peppermint oil
1/4 cup shredded unsweetened coconut
1 dropper Liquid stevia extract

Here's what I did:


Line both loaf pans with parchment paper. Heat chocolate chips in a small saucepan stirring continuously until it's all melty-goodness. Spoon a bit of the melted chocolate to cover the bottom of each pan and put in the freezer to harden (you should have about half the chocolate left after you do this). Meanwhile, stir the syrup into the nut butter in a bowl. In another bowl, mix together the coconut oil, coconut, stevia, and 1/2 tsp of the peppermint oil. When the chocolate has hardened (took about 10 minutes), take out of the freezer and smear one pan with the nut butter mixture and the other with the peppermint mixture. Put the pans back in the freezer to firm up this layer (another 5-10 minutes). Take the pans back out and add the final chocolate layer to the nut butter pan and return it to the freezer. Add a 1/4 tsp of peppermint oil to the remaining chocolate, then use it for the final layer of the peppermint version. (Yes, there's added mint in the top layer of the candy but not in the bottom layer. It just worked out well logistically to use the same pan with the melted chocolate and just add the flavoring at the very end. Between the minty-ness of the filling and the final layer, it's plenty!) Put the mint version back in the freezer one final time. When both are hardened, take out and cut up into bite sized pieces. Share with love!

Senin, 13 Februari 2012

Sweet Treats

Even a Paleo girl needs a treat now and then. With Valentine's Day approaching, I thought I'd share a few of my current favorites. I’ve made these Chocolate Chip Muffins several times over the past few weeks and they’re always a hit. Cute Man even brought them to a bake sale and they went like gangbusters – nobody had any clue there was anything different about them. Using coconut flour is very different from using regular or even the almond flour I like to use. It soaks up a LOT of liquid. You’ll notice there are 6 eggs to only a ½ cup of flour in the linked recipe. That’s not a typo and it’s not up for negotiation. I love to experiment and do my own thing with recipes, but you have to be super careful with baking. Unless you really understand how the ingredients work together, it’s best to follow it as is before deviating too much. In any case, this one needs no tinkering. It’s just that good.

Another important factor is the quality of ingredients. I get my coconut flour from Tropical Traditions. It’s the only brand I’ve ever used and it works out really well with all the recipes I’ve tried (LOVE these Coconut Flour Pancakes!) I’ve heard many complain that other more commercially available brands like Bob’s Red Mill don’t always turn out as well. I can’t say for sure, but I know I won’t be messing with a good thing. I also love these cute Enjoy Life Mini Chips. I can get them at my local grocery store as well as online. They are gluten and dairy free, which is nice. I should also mention that these gluten free muffins can easily be made dairy free if you use coconut oil or Spectrum Naturals Organic Shortening (no trans fats!) instead of butter. I like the butter, though :) The author does mention that she once made them without any butter, oil, etc. by mistake and they turned out well so you might be able to cut the amount down or omit it, if fat is a concern for you (more vitamin K2 for me!) The final touch is to use my Muffin-Top Pan. I just love the texture. I usually make half in that and half in the regular muffin tin so that I can make them all at once (I have one of each). Both are good but the muffin tops are just more… fun.

In advance of V-Day, I will be making these peanut butter cups (using cashew butter) and peppermint patties for some real homemade deliciousness. I have yet to try either recipe but I have high hopes! They are to be a little sweet surprise for Cute Man (glad he’ll be way too busy to read this before he sees them tonight!)

I hope you all have a great Valentines Day!

Senin, 10 Oktober 2011

Meat Cookies (aka Sliders)

Today was a big day in the kitchen. Although most of my recipes this week are coming from Paleo Comfort Foods, this one is an Amelia creation. One of my favorite things to make are these bite sized finger foods. They're great for work lunches or as a grab and go snack. I make these all different ways based on what I have on hand. Here's what I did today:

1 lb grassfed ground beef
1/4 c onion
1/4 c carrot
1/4 c celery
1 tbs grassfed butter
2 tbs coconut flour
2 tbs Parmesan cheese
1 tsp oregano
1 tsp garlic powder
1 tsp salt
1 tsp pepper

Sauté veggies in butter until onions become translucent. Set aside to cool. Put all other ingredients in a large bowl, then add the cooled veggies. Mix everything with clean hands until well combined. Form into slider sized patties and place on foil lined cookie sheet. Rub a little extra salt, pepper, or seasoning mix powder on each side of sliders - this helps make a nice crust on the outside. Broil on high for 6 minutes. Turn sliders and broil on the second side for 3 minutes. Remove from oven and enjoy!